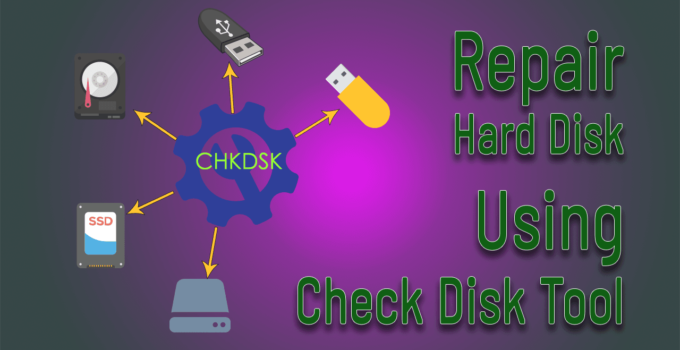
Today we are going to see how we can easily repair hard disk using check disk tool (CHKDSK). It is an inbuilt tool in windows and very helpful in recovering data from bad sectors.
Table of Contents
What is Check Disk tool?
The Check disk tool often referred to as CHKDSK is a built-in utility in Windows 11 and other older versions of Windows. Check disk tool helps us to scan our hard drive for bad sectors, repair bugs on disk level, fix corrupted file systems, repair system errors and reallocate data from the bad sector to a good one. It looks for various parameters like file size location and other in formation on disc level and matches with the data which is actually present on the desk.
The check disk tool looks for part of the drive which is corrupted or has a bad sector. Where your data may be present on the disk or bad sectors which can be a potential cause for data loss in future, check disk tool can help with identification of bad sector and fixing many of them.
you can use this tool even when your disk is slow and this tool can help you in identifying if your HDD is starting to fail.
How long does check disk tool take to scan?
Check disk tool can take as low as 5 minutes to several hours depending upon the capacity and type of hard disk. A NVME SSD can take even less than 5 minutes when it is fully healthy and the disc size is between 500 Gigabyte to 1000 Gigabyte(1 Terabyte) on other hand hard disk drive(HDD) can take few hours for same size of data.
Your computer will lose some performance when the CHKSDK is running, so to finish it quickly, start the test and leave your system idle.
If you are running a check disk tool on a drive and it doesn’t complete, cancel it and run the test again. If the Check disk tool fails multiple times then there is a problem with your HDD or SSD.
Let’s talk on CHKDSK commands
To easily repair hard disk using Check disk tool you should be knowing some details about CHKDSK. This commands are not case sensitive, so you can use upper or lower cases to write this, that means CHKDSK is the same as chkdsk. This command has to be used in administrator mode if you are using Windows 11 or Windows 10. Older versions of windows also require it to be run with elevated privilege.
Correct syntax to Easily repair hard disk using Check disk tool
The key thing to to use any command or code is to know the correct syntax of it. Below is the full correct syntax of the CHKDSK.
chkdsk [<volume>[[<path>]<filename>]] [/f] [/v] [/r] [/x] [/i] [/c] [/l[:<size>]] [/b] Source: Microsoft
<Volume> is the name of drive like C:, D: etc on your hard disk.
<path> is the location or path of scan to be performed.
<filename> specifies a file name to be scanned by CHKDSK.
Lets see all the parameters used with CHKDSK in details below:
List of common CHKDSK parameters
CHKDSK
This command is default Check Disk tool scan command which will scan your C drive (C:) partition of Hard Disk by default for bad sectors and various disc related errors, but it won’t perform any attempt to repair.
CHKDSK [Drive letter] or CHKDSK [<volume>]
To use this command you have to provide a drive letter (eg C:, D:) after CHKDSK and the tool will scan the drive for bad sector and anomalies for which we have provided the drive letter. This command helps us to scan any disk, it can be used to scan an internal hard drive or external USB hard disk or flash drive. How to use it.
CHKDSK C:CHKDSK /f
This command adds a parameter /f after chkdsk to fix the drive for error which we are scanning. The disk will be scanned for any bad sector or corrupted file system entries which will get fixed by the end of scan. How to use it.
CHKDSK D: /fCHKDSK /r
This parameter of Check disk command helps in recovering data from a bad block and moving that data a good part of hard disk and make that data readable. This parameter includes the functionality of /f and analyze the physical hard disks errors along with it. How to use it.
CHKDSK E: /rCHKDSK /x
This parameter of check disk tool disconnect or unmount a hard disk drive, so that it can be checked and fixed, when we run check disk with /x it also provides functionality of /f. How to use it.
CHKDSK D: /xCHKDSK /f /r /x
This kind of combination of various parameters we saw so far is used commonly to disconnect the drive and scan the physical sector of the hard disk. It will even work if we don’t include /f parameter, as /r and /x already have the function of /f. So CHKDSK /f /r /x is equivalent to CHKDSK /r /x. How to use it.
CHKDSK F: /f /r /xCHKDSK /v
This parameter is for verbose mode, which will display the name of each file and corresponding directory which are being scanned. Using this parameter of Check disk tool we can just see the information in detail. How to use it.
CHKDSK D: /vCHKDSK /?
This parameter is for help. It will display all the details related to the check disk tool. How to use it.
CHKDSK /?CHKDSK /offlinescanandfix
This parameter will run an offline scan and fix the disk volume. How to use it.
CHKDSK X: /offlinescanandfixList of other check disk tool parameters
There are few parameter to CHKDSK tool which can be used with NTFS only and some which has to be used with FAT/FAT32/exFAT. We can see those below:
To be used with NTFS only
CHKDSK /i
This parameter allowed the check disk tool to perform the scan of index entries of the disk less vigorously as a result of which it reduces the amount of time required to run check disc tool. How to use it.
CHKDSK C: /iCHKDSK /c
This parameter allows not to check cycles within the folders structure which again reduces is the total scan time which is required by the check disk tool. How to use it.
CHKDSK Y: /cCHKDSK /l[:<size>]
This parameter allows us to set the log file size as per our wish and if we simply use /l the lock file size will be of current size. How to use it.
CHKDSK /l[:<size>]CHKDSK /b
When we add parameter /b, check disk tool clears the list of bad clusters on the volume of the drive and we rescan all allocated and free clusters on that disc for errors. /b include functionality of /r that means it will run scan on physical hard disk. This parameter is mostly used after imaging of volume to new hard disk to check if bad sector data also got imaged to new hard disk. How to use it.
CHKDSK D: /bCHKDSK /scan
Scan parameter of check disk performs an online scan on the hard drive. How to use it.
CHKDSK K: /scanCHKDSK /forceofflinefix
This parameter of check disk tool allows by pass of all online repair and all defects found are queued for offline repair. This command has to be used with /scan. How to use it.
CHKDSK J: /scan /forceofflinefixCHKDSK /spotfix
This parameter of check disk tool runs spot fixing on the volume. How to use it.
CHKDSK Z: /spotfixCHKDSK /pref
This parameter of check disk tool can be called as performance check disk tool, as it uses more system resources to complete the scan as fast as possible, on the other hand it can cause negative performance impact on other running application or on the system. How to use it.
CHKDSK M: /prefCHKDSK /sdcleanup
this parameter does a garbage collect of anyded security descriptive data it works like/have command
CHKDSK /freeorphanedchains
change please this parameter freeze any orphan cluster change instead of recovering their content
CHKDSK /markclean
this parameter of chase this tool marks the volume clean if no corruption of detected even if we have we don’t specify / f command.
How to run CHKDSK in Windows
There are three ways to when CHKDSK in Windows below are the following
Run CHKDSK from command prompt
- Type CMD on the search bar beside the start menu
- Click on Run as administrator
- Type CHKDSK in the command prompt with required parameters and Press enter.
- Run CHKDSK from the Windows File Explorer
- Launch File Explorer and click on This PC.
- On right hand side, you will see all the Hard disk and drives to your PC.
- Right click on any of the drive and click on Properties
- You will see a property dialogue box like below
- Click on Tools tab and then Click on Check
- You will see a new dialogue box with heading Error Checking and it will have option saying Scan drive. Click on it to Scan the drive.
- Disk checking will start, You will be able to see the progress bar like below.
- Once the scan is completed, You will see a dialogue box with the status of scan.
Run CHKDSK from Windows installation media or disk
If you are facing issue with your system and are not able to boot properly or you are experiencing blue screen of deaths on your PC. Then you can use this method to check your disk for issue and errors.
- Connect your bootable installation pen drive containing Windows 11.
- Restart your PC or Laptop and boot from the pen drive.
- While your system is booting and Windows logo appears, Press F8 few times or on the window which says “Install now”, you will find a link “Repair your computer”. Click on it, you will see screen like below.
- Now on the above window click on Troubleshoot. Once you click on troubleshoot a window will appear with a heading ‘Advanced Options”.
- Click on Command prompt to launch it.
- Now here enter the drive you want to scan. Usually C drive will contain Windows operating system, you can verify it by pressing C: and press enter. By typing DIR command you can see the files and if it contains Windows folder or directory its you windows drive.
- Now type CHKDSK command with drive letter, following with the parameter for check disk tool.
These are the various way to access CHKDSK command and run on your system. Please do comment on what you need us to talk about.


